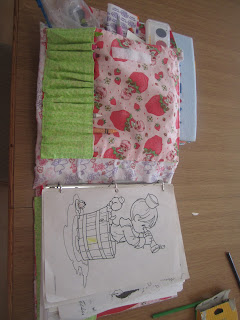
This one is made from an old reader's digest book. I felt bad/guilty when I cut the cover off of the book even though it was pretty much torn up anyway. Time to attend Bibliophiles Anonymous. Of course, I'm ok now because the book turned out great. I did cut the pages a little too big, but that's ok. I feel like I should send it to my grandma though. She'd love that cover. Oh, and it has roughly 100 pages. I didn't actually count, but it looks to be that many.
Protip: Leave a little bit extra room on the spine. I had to take some of the pages off my original page block of sorts because they didn't fit right.
Anyway, on to my gardening adventures book. Here's how I made it:
Materials:
-Lots of glue. (Spray adhesive from the other directions would work well, but I didn't have any. I did -find that a glue stick worked better for this. A glue pen would be excellent for the spine also stated in above book directions.)
-Homemade Mod Podge
-Cardboard
-Scrapbook paper (I ended up using 3 12x12 pages and 2 8.8x11 pages of colored cardstock)
-Copy Paper
-Small strip of fabric (11 by about 3 inches)
-Patience (Good luck here. I have just enough to keep me from opening and messing with my journals. They have 22 hours until I can.)
How to:
First, cut out your cardboard to the size of a normal sheet of paper. 8.5 x 11, assuming that is the size of your paper. You'll need two pieces of cardboard this size:
Then, glue one piece of scrapbook paper you choose as your cover to one piece of cardboard like so:
Use some modpodge or the glue stick (or both if you want) and glue the cardboard to the paper.
Fold the paper over the cardboard and glue down. Repeat for both sides.
Then glue down the smaller sides of the paper. You might need to put something heavy on top to keep the paper down while the glue dries. It takes about 5 minutes. Also, the glue stick works best here.
Repeat for back cover.Protip: Don't use a paper that is covered in glitter. It just doesn't help with the whole gluing thing, but for the record, it DOES work, it just takes a lot longer for the glue to dry/work for you.
Next, cut the 3rd piece of 12x12 paper in half. These will be the spine. Pick out the amount of pages you want, and measure how tall they are. Then, measure out this much plus about 1/2 an inch in the center of one side of the paper. Glue down the cardboard covers, cute print side out, cardboard part in. This picture should help explain that:
Notice how there's two pieces of paper. glue the bottom one like I described above, leaving enough room in the middle for the pages. Then, trip down the second piece of 6x12 paper to 6x11 that way there isn't any excess hanging off. Then, glue it down in line with the cover. Press down on the spine part so the two pages are glued to eachother and there's an indention.
Then, fold the little excess from the front side up and glue it down.
Now, just glue the 8.5x11 pieces of cardstock to the covers:
Finished cover inside
Finished outside:
Now for the pages.
Take your stack of pages and sandwich them between something you don'd mind getting glue on. I didn't have paint sticks or binder clips like the orginial pin did, but I did have some creativity.
I stuck my stack of paper between two pieces of cardboard and then put heavy books on top of it. Then, cover the spine in a bunch of modpodge. Let it dry. if your pages come apart (other than the top one and bottom one that are probably stuck to the cardboard if you did it this way), repeat.
Once your pages stick together, take the piece of fabric and glue it to the spine. You'll have some of the fabric on both the front and back of the pages. Let it dry for about five to ten minutes.
Lastly, cover the spine on the cover part with a ton of glue and stick the pages in the book. Close the book and let it dry 24 hours. It seems best to put a little bit of weight on top of the book. (The original pin says to fill the channel where the pages are with glue. I found this much easier.
Book closed and drying:
Once it is dry, its all ready to use! I'm rather excited for mine to be done! I'm also thinking I might cover it in a layer of clear mailing tape so the cover stays awesome. We shall see.
Did you decide to make this or something similar? Tell me about it!


