After seeing so many DIY planner pins on pinterest, I decided to make one as well, simply because I disliked the style of the ones around here, and they just weren't personal enough for me. I have an awesome app on the iPad I love, but I'd get distracted every time I went to look at it. Stupid bloon's tower defense. (BTW my favorite game since forever. Go play if you haven't previously!). Alas, I decided a paper planner was probably my best bet for the new year, and as of day 6, I'm loving it. All things considered, though, I feel this tutorial would be best split into two parts (obviously). This first part will consist of the making of the actual binder part, and the second will be about the pages. Woo! You get the fun of anticipation! Anyway, on to the crafting!
You'll need:
- one medium flat rate cardboard box or a box of similar size.
- binder rings.
OR
-a binder
AND
-fabric to cover it
-glue. I used superglue for lack of owning a hot glue gun. Elmer's glue just didn't work fast enough for me.
-If making the binder part from scratch, duck tape.
-anything you might want to decorate it with or add.
Directions
Step 1:
Once you decide on the size of your paper (my innard papers are an 8.5x11 folded in half, so 8.5x6.5), measure and cut your cardboard accordingly, you'll want two extra inches on each side, plus an extra two or so for the spine of the binder. The medium flat rate box front and one flap worked great and made for the perfect size.
Step 2: I then cut out extra carsboard for the front and back for stability, and duct taped the pieces together. I left the spine with just one layer.
Step 3:
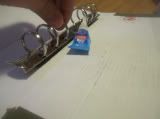
Glue your rings into place. I put mine on the back side. You can either do that or the spine. I assume you've seen stationary before and can figure this part out. Superglue worked wonderfully. (Isn't that one of those amazing inventions we almost couldn't live without? Ha, what am I saying"almost" for?)
Step 4:Then, take your fabric and measure it accordingly. Ok, so I didn't measure anything at all. Instead, I took a largish piece of fabric and folded it. In and cut accordingly until it was the perfect size to cover my binder. Then, before I moved it, I pinned everything I wanted sewn onto it in place.
Step 5:
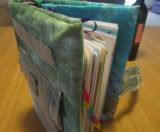
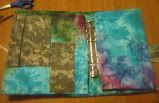
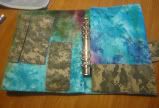
Sew everything into place. I put an in pocket, pen pockets, an outward pocket, a name tape spot of sorts, and a closure that will Velcro closed to the front pocket of awesome. When I finished all of that, I decided a back binder style pocket would be brilliant. (so far, this sudden extra idea is used quite frequently.)
Step 6:Once your sewing is done, just glue the fabric into place. I found it way too difficult and time consuming without a machine to care to sew myself, but if you prefer that look, go for it! Tell me how that goes for you and I might attempt it anyway.
And bam! Your binder is complete! Join me next week to learn about my pages inside!
Happy Crafting!
Curious as to what I'm doing? See the original post here.
Note: I'll try to get a better quality of these pictures uploaded once I figure out what is wrong with the app I normally use. D: Thanks for not caring too much.


No comments:
Post a Comment